Pages

Wednesday, September 10, 2025

Roof Patch

A quick review of this stuff:


It's called Roof and Gutter Instant Patch Tape.  The package specifically mentions that it's from a company called Mortite; I'll explain why later.

First off, I don't know yet if it really works, but the initial indications are hopeful.  It definitely sticks, even to the slipper


Here's why:  it's called tape, but it's not quite what I expected.  It's actually like semi-liquid rubber on a (sort of) non-stick backing tape.  The backing tape is probably pretty non-stick, but the rubber stuff is so sticky it almost adheres to air.
It comes in a roll.  As you unwind it, the bottom is exposed rubber and the top is the backing paper.  The instructions say to stick it to the roof, like you would do with regular tape, then peel off the backing.
Mortite, officially the J.W. Mortell Co. of Kankakee, Illinois, invented rope calk and got a patent for it back in the 1940s.  It got written up in Popular Science magazine.  It's now part of a company called Thermwell Products.  Thermwell started making felt weatherstripping in 1910 (as Thermwool) and introduced Frost King in the 1960s.
Weird fact about the company?  President Obama called it's weatherstripping sexy.


(Quick tip: wear plastic gloves.  I didn't, and earned the chance to experiment with some solvents.  Goo Off worked pretty well).

Tuesday, January 04, 2022

Pill bottles and prescription medicationA death in the family left me with some prescription drugs.  I thought that I shouldn't just toss them or flush them, but wasn't sure what to do with them.  Turns out, a lot of sources begin by saying "don't just throw them a way or flush them down the toilet," then end by saying to throw them away or flush them down the toilet.

Experts say the safest way to get rid of unwanted drugs is through a community "take back drugs" day, a collection center, or to deliver them to a pharmacy that accepts them.  Unfortunately, the timing or the time it takes can make those options difficult.


Near as I can tell, the most convenient and proper, if not best, way to dispose of old prescription drugs is to:

  • If they're on the FDA "Flush List," flush them down the toilet.
  • If they're not on the Flush List, put them into a container, like a bag or a can.
  • Add water to dissolve them.
  • Add something like cat litter or coffee grounds to disguise them from people who might find and want to ingest them.
  • The put the container in the trash.


To preserve your privacy, it's a good idea to remove labels (frustrating) or cover up identifying
information on bottles before throwing them away.

Oddly, these these recommendations aren't intended to protect the environment.  The flush list is to get rid of especially dangerous drugs in a way that keeps people from finding and using them.  The coffee grounds or cat litter are to disguise the drugs, not to "deactivate" them.

According to the FDA, it's not the flushing of unused drugs that's causing problems for fish; the fish are getting drugged by medication that people take, then excrete into the sewage system.  For instance, an anti-diabetes drug can cause male fish to become somewhat female.  Anti-depression drugs in human waste causes some male fish to lose interest in female fish.   Contraceptives can cause some fish to stop eluding predators.  Natural predators.  There's no evidence that salting rivers with contraceptives will up your fishing game.

While we're on the subject, the problem goes the other way too.  People shouldn't take antibiotics intended for fish.  Fish take antibiotics?  People take fish antibiotics?  

Thursday, December 05, 2013

Lost Google Maps: Found, maybe

If you've created a bunch of maps in Google Maps, you maybe getting this error message when you try to get to the older ones:
My Places encountered a temporary error and could not load some items. Please try again later.
People are complaining about it on forums.  If you're struggling with this, here's something you can try.

Clear your cookies, log back in to Google Maps and try again to load the older maps.

Here are the steps:
  • Click on the menu in the upper right corner of Chrome
  • Go down to Tools
  • Then select Clear Browsing Data...
  • Click on: Delete cookies and other site and plug-in data
  • On the "Obliterate the following items from:" line I used the last 4 weeks, but you might have to try a few depending on how many cookies you're willing to get rid of to get to your maps (getting rid of cookies means you may have to log back into various websites and you'll lose your history on some)
  • Go back to maps and refresh the page
  • Try to load your older maps
This worked for me, at least a few times.  Then it stopped working.

Since it's at best a workaround, not a solution, it's a good idea to get the maps you want onto your hard drive or some other place.  Here's how:

In classic maps:
  • Open the map
  • Click on KML
  • Save to the place where you want it
Select KML at the lower right

In the new Google Maps:

  • Open the map
  • Click on the folder icon that's to the left of Add Layers
  • From the menu choose Export to KML
  • Save to the place where you want it
OK, so now you've got your maps in a safe place.  What next?

Well, you can always open them in Google Earth.  If you really want them in Google Maps, it takes a little bit of work.  In the old days, meaning with the old Google Maps, you could just put the KML on a server (or Dropbox) and open it up.  

The new Google Maps doesn't open KML, at least not yet.  Google is hinting that it may in the future.   Here's the official word:
You can import CSV, TSV, or XLSX files, My Maps, or spreadsheets from Google Drive. KML import is not currently supported.
Since the new maps does open csv (comma separated values), you just have to convert your KML file to csv.  How?

One ways is to download a KML to CSV converter like this one.  For a selection, just Google "KML to CSV converter."

Then import the CSV file into Maps Engine Lite as demonstrated this tutorial.


Saturday, October 29, 2011

Quick Terminal in Ubuntu Oneiric

If you've tried to open the terminal using alt+F2 in the new Ubuntu (Oneiric), it probably didn't work.  That's because it has a new shortcut: Alt+Ctl+T.

I'm sure it's a fine shortcut, but it's hard to reverse years of habit.  Feel the same?

It's easy to switch back.  Go to:

System Settings > Keyboard > Launchers.
Select Launch Terminal.
Press Backspace to clear Alt+Ctl+T,
Then press Alt+F2.  

You're done.

Supposedly, you can skip the step of clearing the old shortcut and just hold down the new one for a moment to replace it.  Didn't work for me.


Tuesday, June 07, 2011

The truth of the kernel

For various reasons I sometimes have to know what Linux kernel I'm using with Ubuntu.  It's easy, but I always forget how, so this is as much for my own use as anything else:

To find your current Linux kernel, at the command prompt:
uname -r (quick, short reply)
uname -a (same with a little more information)
The difference between those two is that -r just tells you the version of the Linux kernel.
l@l:~$ uname -r
2.6.32-21-generic
That's pretty straightforward.  The first two numbers, in this case the 2 and the 6, are major and minor releases.  The third number, 32, is the version.  The fourth number, 21, reflects the back-ports that are incorporated into the kernel.

An rc.x at the end means the version is a release candidate, the last revisions before a version is ready for use.

If you're curious, you can browse through the history of Linux 2.6.x.  Or back to the very beginning.  If you want to how Linux kernel numbering has changed over the years and why it changed, you can read the history, complete with primary documents.

Chances are, you're using an operating system that makes use of the Linux kernel, like Ubuntu, Red Hat, Open SUSE and so forth.  These are sometimes called "flavors" of Linux.  Frankly, I find they all taste the same, but they look and operate a little differently.

By using -a, you'll get a response like this:

l@l:~$ uname -a
Linux l 2.6.32-21-generic #32-Ubuntu SMP Fri Apr 16 08:09:38 UTC 2010 x86_64 GNU/Linux


Another way to get information about your kernel is by looking at the /proc file.  The command is:
cat /proc/version
The result, will look like this:

l@l:~$ cat /proc/version
Linux version 2.6.32-21-generic (buildd@yellow) (gcc version 4.4.3 (Ubuntu 4.4.3-4ubuntu5) ) #32-Ubuntu SMP Fri Apr 16 08:09:38 UTC 2010
What does it all mean?  
  • Linux version 2.6.32-21-generic The complete Linux version.
  • (buildd@yellow) The username and host name of the person who compiled the kernel.  Thanks buildb, home everything's going well at yellow.
  • (gcc version 4.4.3 (Ubuntu 4.4.3-4ubuntu5) ) The version of the compiler buildb used.
  • #32-Ubuntu SMP The type of the kernel (SMP means Symmetric Multi-Processing, which means the kernel makes use of multi-core processing)
  • Fri Apr 16 08:09:38 UTC 2010 The time and day that the kernel was compiled.

Git a minute: organize your email, the easy way

Get a lot of email?  Sometimes it hard to keep the inbox from growing.  It's tempting to go through it as quickly as possible, skimming the important stuff, saving some for later and deleting the rest.

Those last two things (saving and deleting) offer you some opportunities to get control of your inbox, rather than just getting through it. And if you do it strategically, you can do in in a minute, literally.

Each time you clear your inbox, take a minute to set up a filter that handles the saving or deleting of one message.

Here's an example: the online statement from your gas company, an investment account, or your mortgage.  If you use Gmail (or another web mail service) you can click:

More actions > Filter messages like these

And then set some rules for handling the message, like storing it for the day you pay bills, permanently storing it (if it's on autopay), or starring it so it's an obvious priority when the next one comes in.

You can do that in 60 seconds.

With some creative use of the filtering rules, you can be amazingly precise in what you do with what message, like highlighting a bill you have to pay, but saving or deleting the company's newsletter, even if they come from the same email address.  You can learn some tips and tricks here.

If you get Facebook alerts, you can star responses to things you've posted, save for later other messages and delete the list of birthdays.

If you commit to permanently handling one message each time you read email, in a week you'll notice how much faster you can get through your inbox.

Tuesday, May 24, 2011

Installing Gimp Plugins

If you ever want to install plugins for The Gimp, the image editing app, you'll have to first install the gimp-dev and glib-dev packages.  It's easy.  You can use the Synaptic Package Manager or apt-get.  But the names are tricky.  Instead of gimp-dev and glib-dev, they're called:

  • libgimp2.0-dev
  • libglib2.0-dev

Monday, April 25, 2011

Replace a Key on a Sony Vaio Laptop

The shift key popped off the keyboard on my laptop. Don't ask. It's a Sony Vaio VPCS111FM with a chiclet-style keyboard.

Putting it back on wasn't hard, it just took a little while to figure out.

After the key came off, I had a hole in the keyboard that looked like this.


And the key and a U-shaped pin that came flying off when the key went.


The underside of the key has two tiny clamps at the top: one for holding the pin and one for attaching the key to a bracket on the keyboard.  The top set of brackets is for the pin.


The pin just snaps into the upper set of clamps.


On the keyboard, theres are two upside-down-U-shaped brackets that you have to slide the legs of the pin into.


There's also a plastic bracket that I've lifted up with a screwdriver here.  It has two pins sticking out from the top that snap into the bracket clamps on the key.


You have to slide the legs of the pin into the brackets on the side, then snap the bracket clamps on the key onto the pins sticking out from the bracket.

I slid the pin into the holes, then slid the top of the key down into the hole in the keyboard so that the bracket clamps were just behind the pins on the bracket.  Then I used a small screwdriver to push the pins into the clamps until they clicked.  It's a very quiet click.


The picture shows how I had it positioned.  Didn't have enough hands to snap a picture while using the screwdriver to push the bracket pins into the clamps.  It's pretty straightforward though.  Just move the key and the bracket so the pins are right between the arms of the clamp, then push the pin in.

After that, just lower the bottom of the key and push down so that the bottom snaps into place.  Should be good until the next time you drop your computer.

Monday, March 14, 2011

Setting mailto: in Chrome and Ubuntu

I must have had an extension that made Gmail the mailto: app in Chrome. Mailto: is what automatically opens up a new email message when you click on an email address, helpfully inserting the address as the recipient.  After cleaning out some extensions I didn't think I used, mailto: stopped working.

No problem. Ubuntu has a convenient way to make mailto: work. It's called Desktop Webmail.

Applications > Internet > Desktop Webmail

That gets you a dropdown menu from which you can pick the webmail you use, like Gmail, Yahoo, etc.

Check Gmail (or whichever service you use) and clicking on an email link will open your mail service to a new message addressed to the address you clicked.

I'd show you a picture of the dropdown menu, but I can't. Below the dropdown menu there was a cryptic checkbox labelled simply "Ask again." I didn't know what it meant, but assumed it had something to do with asking which webmail service I wanted to use each time I clicked on an email address. I unchecked the box.

Now when I go to Applications > Internet > Desktop Webmail it opens Gmail instead of opening the menu. Apparently "Ask again" meant giving me the option of changing my default webmail service. Oh well.

Incidentally, if you don't see Desktop Webmail among your applications, you can install it from the repository or with:
sudo apt-get install desktop-webmail

Monday, February 28, 2011

dEATH TO cAPS lOCK

The first thing I ever heard about Google's new keyboard was it's lack of a Caps Lock button. My response was instant and visceral. Years, wait, no, it’s decades, of inchoate anger and frustration suddenly came into focus. It hit me LIKE A TON OF BRICKS: I hate caps lock.

I do. I really do.

The caps lock button is a nearly useless imposition in almost exactly the wrong place on a keyboard.

Think about it. How often do you have to, or even want to, type something in all caps. And even when you’ve wanted to, did you really, after some reflection and hindsight, really want to. Or was it a juvenile outburst that ultimately detracted from what what you were trying to say. Like crying during a confrontation with your boss, or insulting someone’s mother during an argument (that’s not in any way related to the person’s mother).

Without the caps lock button, you would have had to hold down one of the shift buttons while typing each letter. That’s awkward. Appropriately awkward. Awkward enough that it forces you to think about the appropriateness of capitalizing every letter.

In this case, eliminating caps lock is like storing a rifle unloaded. Or counting to ten before replying.

And even if you could come up with a reason for having a caps lock button, why would it be right between two important and useful buttons like Shift and Tab; right where my little finger can tap it when I'm trying to capitalize a single letter (which serves a useful purpose) or tabbing (to indent or move to a different box in a form). How many times have I screwed up a log in because I accidentally hit caps lock and, as a result, typed my (hidden) password with lowercase and uppercase reversed.

Sure keyboards include a little LED to let you know that you've accidentally hit the caps lock button, but that's like building the Eiffel Tower so that you can put a red light on top of it so airplanes don't hit it.

No caps lock is an ingenious innovation. Sure it's nice to invent something new, but to accomplish something new by getting rid of something old, omnipresent and useless is a triumph of imagination. It's like Sherlock Holmes hearing the silence of the dog that didn't bark.

Not everybody is enthusiastic about living without caps lock. I listened to a Slate podcast with people complaining about it.

“We need capital letters,” one person said, as if Google were trying to ban capital letters altogether. I don’t believe that’s Google’s (note the G) intent or the effect of it’s action.

Want proof? I’m writing this on CR-48, using the very keyboard onto which Google ingeniusly eliminated caps lock. Note the capital letters at the beginning of sentences.

Capitalization can survive without caps lock. (Whether it can survive Twitter, instant messages, and Generation Y is a different issue).

Wednesday, February 16, 2011

It's all in a uname, if you use ` and not '

If you want know which Linux kernel you're running, you can just type "uname - r" (without the quotes) into the terminal -- we've been through that before.

You can also use uname to insert your kernel version into another command.  For instance, if you want to install the linux headers (which have to be the right ones for your kernel) you could use:
sudo apt-get install linux-headers-2.6.35-26-generic
Assuming that's the kernel you're running.

Unless you know the version off the top of your head, you can save yourself a step by putting uname into the command, as in:
sudo apt-get install linux-headers-`uname -r`
Seems simple, huh?  But there's a catch: those aren't single quotation marks surrounding uname -r.  They're backticks.

If you look closely, you'll see that they're ` and not '.  The backtick (aka grave accent) is often on the same key as the tilde (~) just under Esc on the upper left of the keyboard.

Stop that!

Sometimes it seems easier to start something from the command line than to stop it.  Ping, for instance.

To stop whatever you're running in the terminal, type:

Ctrl+c

That's it.

If the issue happens to be ping, you can do it preemptively, by limiting the number of pings.  Just use this command:

ping -c [number of pings you want]
as in:
ping -c 7 www.google.com

Friday, December 03, 2010

Getting HTML code to show up in Blogger

If you want to write something in a blog that happens to be HTML code, you can get it to show up by using alternatives to characters.

In the last post, I was trying to write /<microSD>/ as part of an explanation.  What I posted was just //.  It's because Blogger and the browser interpreted the < > as html code and didn't show it as text.

Why's it showing up here?  Because I didn't actually insert a <.   What I put in is "& l t ; " and "& g t" (without the spaces and quotation marks).  Blogger replaces that set of characters with < and  >.

The alternates are Unicode Alternatives for special characters in HTML.  That link has a long list of them and explains where and how they work.

Really simple directions for making Rockbox playlists

If you're starting to use Rockbox, start with playlists.

Rockbox treats everything it's playing as part of a playlist. If you put a bunch of songs into a folder, then start to play one of them, Rockbox automatically puts all of the songs in that folder into a playlist. You won't necessarily know it unless you decide to save it as a playlist.

This post is about creating playlists using your computer.  You can also create playlists using just your player and Rockbox, but that's a separate discussion.

What's a playlist?
A playlist is really just a list of songs. What makes it into a playlist is that there's a file path connected with each song on the list. When Rockbox reads the next song on the playlist, it uses the file path to find the song. Rockbox knows it's a playlist because of the file name extension: .m3u or .m3u8.

Incidentally, Rockbox creates playlists using .m3u8 as the extension. Most computer-based music managers seem to use .m3u. Rockbox recognizes either one.

A playlist file will look like:
playlist.m3u
or
playlist.m3u8.
The keys to making your playlists work are:
  • getting the file paths right so Rockbox can find the songs
  • getting the file extension right so Rockbox knows they're playlists
  • getting your playlists in the right folder so they show up in the Playlist Catalog

File Paths
First the file paths.   The file system Rockbox uses is just like the one on your computer.   It's identical if you use Linux.  If you use Windows, there's one significant difference: the Rockbox root directory (the base directly that every other folder and file is a part of) is called "/". That a forward slash without the quotation marks.

In Windows, the root directly is probably something like C:\ or G:\. In Rockbox, it's /.   Rockbox, like Linux, uses a forward slash instead of a backslash, but I've read that it understands both.  Haven't tested that though -- I always use a forward slash.

Rockbox Folders
On my Sansa Fuze, with a micro SD card in it, I have two root folders:
  • /
  • /<microSD>/
My songs are in these two folders:

  • /<microSD>/MUSIC/
  • /MUSIC/

    My songs names look like this:
    • 01 - Suzie Q.mp3
    • 01 - Sympathy For the Devil.mp3
    for no particular reason other than it's convenient for the way I store them on my computer. I use this file structure:
    /Music/"Band"/"Album"/"Track Number" - "Title".mp3
    This isn't significant; you can name your songs anything you want.  If I'd designed it with the portable player in mind, I might have left off the track number for simplicity.

    A playlist looks like this:
    /<microSD>/MUSIC/01 - Suzie Q.mp3
    /<microSD>/MUSIC/01 - Sympathy For the Devil.mp3
    /<microSD>/MUSIC/01 - The Red Rooster.mp3
    /MUSIC/1 - I Can't Be Satisfied.mp3
    /MUSIC/01 - I'm A Man.mp3
    The songs that begin with "/MUSIC/" are on the players' internal storage in the "MUSIC" folder. The songs that begin with "//MUSIC/ are on the micro SD disk in the "MUSIC" folder.

    To show up in the Rockbox Playlist Catalog, playlists have to be in the playlist folder:

    /Playlists/
    So the name for the example playlist could be:
    Blues.m3u
    and the complete file name (the one you'd use as the file path in a playlist) would be
    /Playlists/Blues.m3u
    Creating a Playlist
    To create a playlist on your computer, you can use a text editor.  Just a simple text editor is easiest.  You can use a word processor like OpenOffice Writer or Microsoft Word, but you have to save it as a text file.  If you save it as the regular .odt or .doc file it will have a lot of formatting information that will confuse Rockbox.

    For me, it's easiest to make a list of the songs first, then add the file paths.  So I start by typing just the file names:

    01 - Suzie Q.mp3
    01 - Sympathy For the Devil.mp3
    01 - The Red Rooster.mp3
    1 - I Can't Be Satisfied.mp3 
    01 - I'm A Man.mp3

    Once that's done I add the paths using copy and paste.  If the first song is in /<microSD>/MUSIC/, I type that in, copy it, and paste it in front of all the songs that are on the microSD card.

    Then I do the same for the songs /MUSIC/.

    Then I save the playlist as playlistname.m3u8 into the /Playlists folder.

    Incidentally, for some reason when I create a playlist using Rockbox itself, the default is for Rockbox to save it in the root directory.  That means it doesn't show up in the Playlist Catalog.  To create it in the /Playlist folder, you have to add /Playlist to the beginning of the name.  That's a real pain when you're using Rockbox's internal keypad.

    It's probably just a setting I have to adjust somewhere, but I haven't figured it out yet.

    Absolute and Relative File Paths
    You can use two different kinds of file paths in Rockbox: Absolute and Relative.

    File paths are just like directions. If you ask someone where the nearest coffee shop is, he can give you directions two ways. One is relative: "go two blocks ahead, then turn left." The other is absolute: "it's on the corner of 3rd and Pine St."

    For the relative directions, you obviously have to know where you are. The wouldn't work in a newspaper ad, for instance.

    File paths in playlists are the same way. The file path for a song can be absolute, meaning it starts with a root directory, or it can be relative, meaning it starts from the directory where the playlist is stored.

    Since the Rockbox Playlist Catalog only lists playlists in the /Playlists directory, it's fairly easy to use either kind of file path. I find it easier to stick with absolute.

    I've read that Rockbox tries to make file paths work even if there missed up. If it doesn't find the song using the filepath on the playlist, it will lop off directories until it finds it. So, for instance, if you the song is in /MUSIC/song.mp3, but you wrote the file path as /NEW/MUSIC/song.mp3, Rockbox would discover that there's no /NEW/ and move on to /MUSIC/.

    I haven't actually tested that, but Rockbox has played a few songs from file paths I messed up.

    Sunday, October 24, 2010

    Chrome at Home

    Chrome can open local html files.  You just have to hit:

    Ctrl + O

    That opens a regular window into your local hard drives. You just browse for the file you want and click Open.

    Local files are just files stored somewhere on your computer (hard drive, disk, USB drive, etc.) as opposed to on the Internet.

    Sunday, October 17, 2010

    Get at the guts

    Here's a great resource if you have a Sony laptop. A company called Northwood Systems is posting teardown guides.  So far they have guides for VGN series laptops, but they're promising more models in the future.

    Friday, September 10, 2010

    The truth of the kernel

    Sometimes you have to know what Linux kernel you're using with your operating system, like Ubuntu.  It's easy, but I always forget how, so this is as much for my own use as anything else:

    To find your current Linux kernel, at the command prompt:
    uname -r (quick, short reply)
    uname -a (same with a little more information)
    The difference between those two is that -r just tells you the version of the Linux kernel.
    l@l:~$ uname -r
    2.6.32-21-generic
    That's pretty straightforward.  The first two numbers, in this case the 2 and the 6, are major and minor releases.  The third number, 32, is the version.  The fourth number, 21, reflects the back-ports that are incorporated into the kernel.

    An rc.x at the end means the version is a release candidate, the last revisions before a version is ready for use.

    If you're curious, you can browse through the history of Linux 2.6.x.  Or back to the very beginning.  If you want to how Linux kernel numbering has changed over the years and why it changed, you can read the history, complete with primary documents.

    Chances are, you're using an operating system that makes use of the Linux kernel, like Ubuntu, Red Hat, Open SUSE and so forth.  These are sometimes called "flavors" of Linux.  Frankly, I find they all taste the same, but they look and operate a little differently.

    By using -a, you'll get a response like this:

    l@l:~$ uname -a
    Linux l 2.6.32-21-generic #32-Ubuntu SMP Fri Apr 16 08:09:38 UTC 2010 x86_64 GNU/Linux
    That tells us that the machine is running Linux, the machine name is "l" and the Linux version is 2.6.32-21-generic.

    I have no idea what the #32 means.  If you do, please let me know.

    Ubuntu is the operating system and SMP means it uses the multiple cores of the processor.

    The date is when the kernel was built.  The x86_64 means it's a 64-bit processor in the X86 family.  GNU/Linux is, by some accounts, the full name of the Linux core.

    Another way to get information about your kernel is by looking at the /proc file.  The command is:
    cat /proc/version
    The result, will look like this:

    l@l:~$ cat /proc/version
    Linux version 2.6.32-21-generic (buildd@yellow) (gcc version 4.4.3 (Ubuntu 4.4.3-4ubuntu5) ) #32-Ubuntu SMP Fri Apr 16 08:09:38 UTC 2010
    What does it all mean?  
    • Linux version 2.6.32-21-generic The complete Linux version.
    • (buildd@yellow) The username and host name of the person who compiled the kernel.  Thanks buildb, home everything's going well at yellow.
    • (gcc version 4.4.3 (Ubuntu 4.4.3-4ubuntu5) ) The version of the compiler buildb used.
    • #32-Ubuntu SMP The type of the kernel (SMP means Symmetric Multi-Processing, which means the kernel makes use of multi-core processing)
    • Fri Apr 16 08:09:38 UTC 2010 The time and day that the kernel was compiled.

    Wednesday, August 25, 2010

    Three quick ways to bring back the past

    When you're browsing the web, it's easy to accidentally close a tab.  Bringing it back is almost as easy, but different, in Firefox and Chrome.

    In Firefox, you just go to the Toolbar:
    History > Recently Closed Tabs
    If you prefer keystrokes, just hit Alt + S to open the History menu.

    "Recently Closed Tabs" is second from the bottom (just above Recently Closed Windows).

    Choose the tab you want from the list and click.  It will open as a new tab.  Or, actually, as an old tab -- the one you closed, in the same position as the one you closed and with the same history as the one you closed.  Cool.

    In Chrome it's a little different.

    To bring back the last tab you closed:
    Shift+Ctrl+T
    The last-closed tab will open right back where it was.  Use the same key combination again and the penultimately-closed tab will pop back open.

    (Note to Ms. Shappenheimer: Ok, you were right, I did use that word. Note to everyone else: Please note what a capacious vocabulary I have).

    If you want to chose from a list which recently-closed tab to open, you can do that too.  Just open a new tab by clicking on the + to the right of the open tabs.   You'll find the list right below the miniature versions of your most visited tabs.
    A little farther down, on the right, you'll see a link to your browsing History.  That will take you to a list of all the web pages you've visited.
    If you want the history of a single tab (the current tab), put the cursor on the Go Back arrow and right click.  This history list will drop down.

    Actually, there's another way to do the same thing.  Instead of right clicking on the Go Back arrow, left click but hold the click until the list drops down.  If you don't hold the click you'll, you guessed it, go back.

    Why two ways to do the same thing?  Google believes it's an important enough function that you'll want a backup in case the primary method wears out.

    Thursday, August 05, 2010

    Rockbox: a great new operating system for your Sansa Fuze

    Rockbox is a Linux-based operating system (I think it's technically "firmware") for portable music players like the Sansa Fuze and iPOD.  It's easy to navigate, has lots of skins and lets you fine tune your music playback with the kind of options you usually find on sophisticated stereo systems.

    I have a 4 GB Sansa Fuze V01 and Rockbox works great on it.   Things can go wrong, though, and installing Rockbox could possibly brick your player.  Bricking means it will no longer work, giving it the  functionality of a brick, but without the weight and structural strength.

    Installing Rockbox on the Fuze
    The type and version of player you have matters, so you have to make sure your specific player is supported by the current version of Rockbox.

    Using the original Sansa Fuze firmware, you can get this information by going to:
    Settings > System Settings > Info
    Version is the first line. Mine looks like: V01.02.31P

    You can check here to see if Rockbox supports your version.

    I used the automatic installer, which you can download from here. It was easy to follow through the installation screens.

    Once you have Rockbox installed, all you have to do is turn on the Fuze and it will boot up to Rockbox. If you want to use the original Sansa Fuze firmware, just do this:
    • Turn off the Fuze
    • Hold down the rewind button (|<< on the control wheel)
    • Turn on the Fuze
    It will boot up the original firmware.  You can only load music through the original firmware.

    If you want to charge the player while running Rockbox, hold the center button (Rockbox calls it the "Select" button) down while plugging the cable into the Fuze.

    The origonal firmware will also automatically boot anytime your Fuze is connected to the USB cable, whether you're using it to transfer music or charge the battery.

    When you're using Rockbox, his is how the controls work:


    That diagram is from the Rockbox manual for the Fuze.http://download.rockbox.org/daily/manual/rockbox-sansafuzev2/rockbox_interface/images/sansafuze-front.png

    Wednesday, July 21, 2010

    The easy (easiest?) way to sign pdf documents

    PDF documents are a pain in the butt if you're trying to eliminate paper and work electronically.  They're hard to edit unless you want to spend a bundle on the official Adobe program, and I'm way to cheap for that.

    Okular works well for adding annotations, but it doesn't help at all for adding a signature to PDF docs.  For that you have to be able to either draw a random line (your signature) or insert an image (of your signature).

    Why do it?
    Why would I want to electronically insert my signature into a PDF doc?

    Well, to sign it of course.  Let's say I have to transfer money from my bank account.  They won't let me do that online; for security they want a hard copy of a signed authorization form.

    The bank wants to fax it to me, have me sign it, and fax it back.

    Here's the catch: my fax machine is buried in a landfill somewhere, a layer above my old dot-matrix printer and a couple layers below my external ZIP Drive.

    Sure, I could receive the fax into my computer (or get it my email), print it out, sign it, scan it back into my computer, then email or fax it back.  But there are some problems with that.

    First, it wastes paper.  Second, it's not elegant.  Third, it violates the basic principle of Hopeful Hacking, which is that if you expend enough time and effort experimenting, you can always find a better (or at least different) way of doing things.

    Back from the digression
    Here's another option.  To do it, you have to have a graphics editing program called GIMP.  It's in the Ubuntu repositories, so you can added it with Synaptic or by typing
    sudo apt-get install GIMP
    at the command line.   (It's available for Windows as well as Linux).

    GIMP used to come with Ubuntu, but as the developers added more abilities, the folks at Ubuntu decided it had become more than the basic functionality they like to include with the base install.  I'm sure it also added to the difficulty of fitting the Ubuntu installation on a single CD.

    All that functionality is great, but it's specifically not the point of this post.  The point here is to use GIMP to do just one thing: add your signature to PDFs.


    Opening GIMP gives you three windows: the main editing window (in the middle), the Toolbox (on the left) and the Layers, Channels, etc window (on the right).

    If, for some reason, they're not open, you can use CTRL+T to open the Toolbox and CTRL+L to open the layers window.

    You can clear clutter by closing any other windows that happen to open.

    Your Signature
    First, you have to create an electronic image of your signature.  We're going to do it entirely on the computer.

    Another option would be to sign a blank piece of paper, then scan it into your computer.
    In the main window, click
    File > New
    You'll get the Create a New Image dialog box.

    Click on the Template dropdown menu and select US-Letter (300ppi), then click the + sign by Advanced Options.

    Click the Fill With dropdown menu and choose Transparency.  This is critical.  If you don't use a transparent background, your signature will mess up the document you're trying to sign.


    Click OK and you should get a blank image with a transparent background.  GIMP uses a light and dark gray checkerboard pattern to indicate transparency.

    At the bottom left of the main editing window you can adjust the size of the image.  I chose 25%, but you can pick whatever you want as long as it's big enough to sign your name and not so big that you have to scroll to see it all.


    To get ready for signing your name, go over to the Toolbox window.


    Click on the icon for Pencil Tool.


    Below the tool icons there are some options for the Pencil Tool.  Normal mode is fine.  Opacity should be 100%.   Brush sets the size of the line you'll be drawing.  I think Circle (11) works pretty well.  You can experiment.  Scale starts at 1.  You can move the slider to make the line thicker or thinner.

    Just remember that you should judge by the way it looks in the final document, not the way it looks now.
    Now you draw your signature.  This can be the hardest part of the whole process.

    I used the mouse.  You just hold down the left mouse button and write.  When you release the button, the writing stops.  Press it again to start writing again.

    You can hit CTRL+Z to erase the last thing you wrote and try again.

    After using CTRL+Z a couple of dozen times, you might start wondering if there's a better way.
    Well, sure there is.

    You could write on a piece of paper and scan it, as I mentioned earlier.

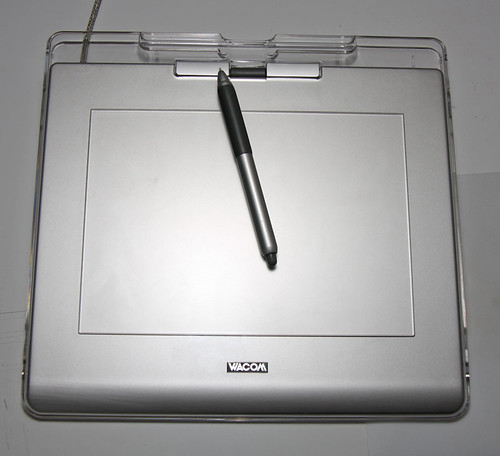
    Another option is to get a graphics tablet.  I have an old WACOM Graphire that connects through a USB port.

    It works great but, frankly, I wouldn't buy one just for this.  With a little practice you can get a pretty good signature using your mouse, or even a touchpad.


    OK, maybe not the touchpad so much.  That's what I used to copy John Hancock's signature here.
    If anyone ever accuses me of forging a copy of the Declaration of Independence, this should clear me.

    Once your satisfied with your signature, or at least tired of working on it, you just have to save it properly.

    First, we should get it down to a reasonable size.  That US-Letter size image space made plenty of room for writing, but it's a lot bigger than necessary.

    Go back over to the Toolbox and select the Rectangle Select Tool.


    It's a little rectangle icon at the upper left.

    Now you draw a rectangle around your signature.  Pick the part that sticks out the farthest and put the cursor just beyond the line.  Left click the mouse and move the cursor toward what will be the opposite corner of your selected rectangle.  Then release the mouse button.

    The result should look like this.


    With the signature selected, go to the menu bar and select
    Image > Crop to Selection


    At this point, you could make a decision.  But I suggest you don't.  If you've followed these instructions as meticulously as I know you have, your signature is going to be pretty doggone big compared to the document you'll be signing.  Unless you really are forging the Declaration of Independence.

    You could go back up to the Image menu, choose Scale Image and shrink it down to a more reasonable size.  It would actually save you a bit of trouble later, but it could also cause you problems later.

    For the moment, I suggest you leave the size alone, (which is what you probably would have done if I hadn't brought this issue up).  On second thought, forget I mentioned this.

    You'll want to save the image as a PNG file.  They compress nicely, they're versatile but, most important for this exercise, they save transparency.  JPEGs don't do that.

    Oh, GIMP actually has it's own file format that makes it easy to make adjustments later.  It's .xcf.  That's dot-xcf and then a period that's not related to the file extension.

    If you want to save the file that way first, it will make it easier to come back and adjust your signature later if you want.

    In any case, for what we're doing, you'll need a png file.  Select
    File > Save
    In the Save Image dialog box, choose a name like signature.png (for now, you can change it to xpdjf.dtr later for security).


    This is the end of Part 1.  You only have to do this part once, providing you don't give the file a random name and store it in an obscure place and lose it forever.

    Is it safe?
    OK, you may also be wondering if it's secure to store a digital image of your signature on your computer.

    I don't know.  I guess it's as secure as a lot of other things.  Now that you have a nice digital image of your signature, I wouldn't suggest posting it on Flickr, no matter how elegant it is.  That would be asking for trouble.  


    Emailing it doesn't seem less secure than faxing, or snail mailing.  People send faxes to wrong numbers all the time.  Someone could intercept a bill payment in the mail.  How hard would it be for someone to cut your signature out of something and scan it themselves?

    Someone could hack into your computer and steal the image.  But once they're in your computer there's probably a lot of things they could do to make you miserable.  If you're worried about it, give the file a name like expidff.conf and save it to /proc/1415.   I've done that with files and never found them again myself.


    Adding your signature to the PDF doc
    Now we're getting somewhere.

    In the main GIMP window choose
    File > Open
    and select the PDF file you want to sign.  I'm using one called lease.pdf.


    Instead of popping right open, you get an Import from PDF dialog box because GIMP can't open PDFs directly.

    Select the page or pages you want, then click Import.


    When it opens, scroll down to the place you need to sign.  Remember that you can adjust the view size at the bottom left of the window.

    Now go back up to the top and choose
    File > Open as Layers


    Choose your signature image file and open it.

    You may not see it very well in the edit window; it's going to be huge and may be at the edge of the window.

    You will see it in the Layers window.


    It will be right above the imported PDF image which will be named something like "1".

    It helps here to know just a bit about how GIMP works.  It builds images from independent layers.  You can add layers, delete layers, edit layers, move layers up and down and a lot more.

    In this case, you're only going to have two layers: the imported PDF file and the signature.  Make sure the signature layer stays on top of the PDF doc layer.  Literally.  As long as it's above the PDF doc layer in the Layers window, it will be above the PDF doc in the edit window.  If it somehow moves below the PDF doc layer, you won't see it in the editing window.

    The first thing we're going to do is make you signature a more reasonable size.  With it's layer highlighted in the Layers window, move back over to the editing window.  Select
    Layer > Scale Layer


    In the dialog box that opens, enter 250 into the Width box.  It's just a guess, you can adjust it later.


    Click Scale.

    (By default the Width and Height boxes are linked -- as indicate by a little chain link image to the right of the boxes.  When you entered 250 and hit Tab, it should have automatically changed the Height number to preserve the aspect ratio of the signature image.  If it didn't, your signature will be really tall and narrow.  If that happens, hit CTRL+Z to undo the scaling.  Once the layer is back to its original size, reopen the Scale Image dialog box and click on the little chain image.  That should change it from an unlinked chain to a linked chain.   Then just reenter the width).

    Now go over to the Toolbox and select the Move Tool.  It looks like a plus sign with arrows at the end of the lines.


    Lower down in the Toolbox, select Move the active layer.

    Now put your cursor on the signature layer, hold down the left mouse button and draf the signature to the right place on the PDF doc.


    There you go.  You can adjust the position or the scale to make it look right.
    To add the date (there's always a date), go back to the Toolbox and click on the Text Tool icon.


    Put your cursor where you want to start the date and left click the mouse.  The GIMP Test Editor box will open.  Enter the date and click Close.


    If it's not in the right spot, you can move it.  It's another layer.  Click on it in the Layers window, choose the Move Tool again and put it in the right spot.

    Now all you have to do is create the final, signed PDF document.
    Go to
    File > Print


    Instead of selecting a printer, select Print to File.


    Enter a file name, choose a folder to store it in and for Output format select PDF.  Click on Print and your done.

    When you open the new PDF document it should be the original plus your signature and the date.